Account Setup
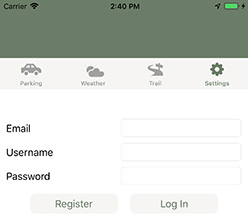
Register: Before using TrailCheck, you must create an account. Click the Settings tab, then enter your email address and the username and password you want to use. Then click Register. That's it!
Log in: TrailCheck will keep you logged in indefinitely, but if you need to log out, you can click Log Out on the Settings page. To log in again later, just enter your username and password; you don't need to enter your email address again. Then click Log In.
Edit account info: If you want to change your email address, username or password, click Edit on the Settings page, then edit the fields as needed. Then click Save, and you will be prompted for your old username and password to verify that it's you.
Select a Trailhead
Before you can view or submit data, you'll need to select a trailhead. From the Parking, Weather or Trail pages, click one of the options in the top toolbar:
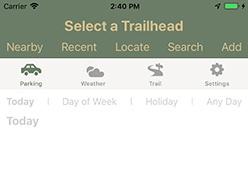
- Nearby: This option shows a list of trailheads sorted by distance from your current location.
- Recent: This option shows a list of the trailheads you've selected recently.
- Locate: If you want to select a trailhead that isn't in the Nearby or Recent lists, use this option to show a map, then select a trailhead from the map.
- Search: This option lets you type in the name of a trailhead and select from a list of search results.
- Add: If you can't find the trailhead you're looking for, it might not be in our database yet. To add it, drag the map until the crosshair is at the trailhead location, then enter the trailhead name and click Save. Here are some tips for adding trailheads:
- If possible, position the crosshairs right where the trail begins, not in the parking area or a location up the trail.
- You don't need to include "trailhead" in the name. For example, enter "Wahkeena Falls" instead of "Wahkeena Falls Trailhead."
- Duplicate entries are bad! The app will ask for confirmation if another trailhead already exists near the one you're entering. Sometimes two trailheads are close together and it's fine to proceed, but please don't enter an existing trailhead again.
Select a Specific Location
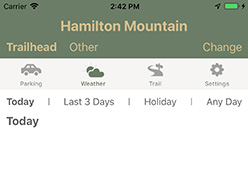
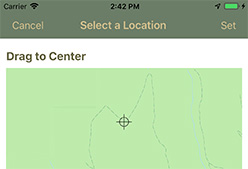
By default, users will submit updates that indicate conditions for the trailhead or the trail as a whole. But users can also submit updates for specific trail locations, which is useful to show weather changes at different elevations, or the locations of hazards. In the top toolbar, click Other to show a map with the locations of these updates. Click a location to view updates within 1/10 mile of that location. You can click Trailhead to return to the default view.
Select a Time Period
You can filter the available data by clicking the time options near the top of the screen:
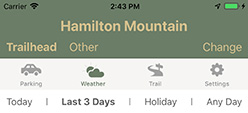
- Today: Show data added so far today. This gives the most accurate conditions, as long as enough people are submitting updates.
- Last 3 Days: Show an average of data submitted over the last three days. This is useful to show how the weather changes throughout the day at this time of year.
- Day of Week: Show data from the last four weeks on the selected day of the week. This is useful to see how parking usage varies throughout the week, so you can plan around peak times.
- Holiday: Show data from recent years on the selected holiday. This is useful to see how parking usage is affected by a holiday, or to check typical weather for that time of year.
- Any Day: Show data from the selected date. You can use this if you're looking for something you can't find with the other options.
Reading the Data
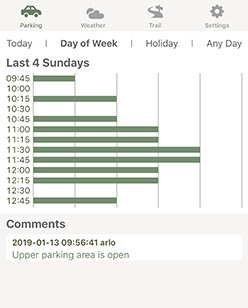
- Parking: Parking data is displayed as a chart showing the average usage for each 15-minute increment throughout the day. The chart times will extend from the earliest to the latest submitted update, and you can scroll vertically if the entire chart doesn't fit on your screen. The shortest bar means the parking area is deserted and the longest bar means it's overflowing. No bar means no data has been submitted for that time. You can also scroll through the comments for additional updates, such as the status of overflow parking areas or a reduction in parking space due to snow buildup.
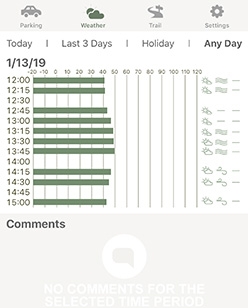
- Weather: Weather data is displayed as a chart showing the average temperature for each 15-minute increment throughout the day. The chart times will extend from the earliest to the latest submitted update, and you can scroll vertically if the entire chart doesn't fit on your screen. No bar means no temperature has been submitted for that time. To the right of the bars, icons will show the sky, wind and precipitation for that time. No icon means no data has been submitted. You can also scroll through the comments for additional updates.
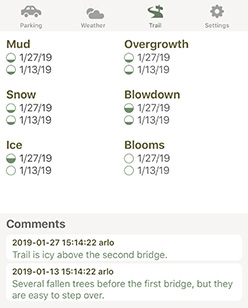
- Trail: Trail data is displayed as the last three updates for each category (mud, snow, ice, overgrowth, blowdown and blooms). Each update has a circle icon ranging from empty (none) to full (heavy or severe). You can also scroll through the comments for additional updates, such as a description of what elevation the snow starts, or other hazards not included in the above categories.
Submit an Update
Your participation in submitting updates is what makes TrailCheck useful! For parking and weather, it's best to submit one update when you arrive at a trailhead and another before you leave. This provides twice as much data for other users to work with. You can also submit updates for common landmarks along a trail, such as a summit or ridge, a creek crossing or a picnic meadow. This helps other users prepare for weather differences or hazards. It's best to submit updates in real time so you can remember the conditions accurately, but you can also submit them after your activity ends.
You can submit updates without an Internet connection for trailheads that you have recently viewed. Trailcheck will hold your updates, then check for an Internet connection every two hours and submit them when a connection is availlable. You cannot search for or add trailheads without an Internet connection.
To submit an update, click the Submit button at the bottom of the Parking, Weather or Trail page. You'll see these elements on the submission form:
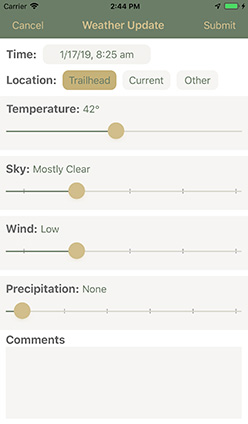
- Time: By default, your update will be logged at the current time. If you're submitting updates later, such as after you return to the trailhead or return home, you can click the time display and enter the actual time you observed the conditions.
- Location: By default, your update will be logged to the selected trailhead. If you want to provide weather or trail conditions for a specific location on the trail, you can click Other and then drag the map to select the location. Or if you're submitting from the trail, you can click Current to select your current location.
- Sliders: Move the sliders to indicate the conditions. As you do, you'll see labels appear to describe each setting. At the leftmost position, no value will be submitted, so if there is no snow, for example, you should move the slider to the first position, so the label changes to None. If you don't want to use a slider because you don't remember the condition, you can move it all the way to the left, so the label changes to --.
- Comments: Include any details that would be relevant to other users. You should be concise, but not at the expense of clarity. Please avoid ambiguous comments, abbreviations that aren't widely known, personal experiences or opinions. Just the facts! 😉


